iOS项目嵌入Flutter模块生成的frameworks
与直接嵌入FLutter模块的相比,
- 优势
- 本地无需安装Flutter SDK 和 CocoaPods,本地集成相应frameworks即可。
- 缺点
- flutter代码一经作修改,需要重新集成flutter framework;
1.创建Flutter模块
 1
 2
 3
 4
 5
 6
 7
 8
 9
10
|
ksnowlv@MacBook-Pro-3 FlutterProjects % flutter create -t module flutter_module
Creating project flutter_module...
Resolving dependencies in flutter_module...
Got dependencies in flutter_module.
Wrote 12 files.

All done!
Your module code is in flutter_module/lib/main.dart.
ksnowlv@MacBook-Pro-3 FlutterProjects % ls
README.md	base_demo	flutter_module	hello_world
|
2.生成frameworks
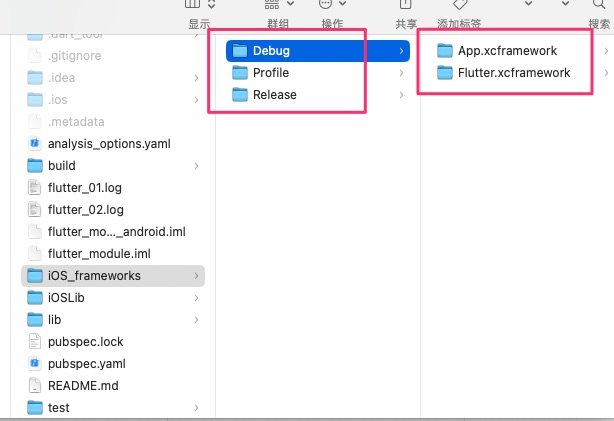
在flutter_module模块目录下,创建iOS_frameworks目录,
flutter build ios-framework --output=目录
使用flutter build ios-framework生成库文件
 1
 2
 3
 4
 5
 6
 7
 8
 9
10
11
12
13
14
15
16
17
18
19
20
21
22
23
24
25
26
27
|
(base) ksnowlv@MacBook-Pro-3 flutter_module %  flutter build ios-framework --cocoapods  --output=../FlutterCocoaFrameworkTest/FlutterLib

Building frameworks for com.example.flutterModule in debug mode...
Flutter assets will be downloaded from https://storage.flutter-io.cn. Make sure you trust this source!
 ├─Creating Flutter.podspec...                                       6ms
 ├─Building App.xcframework...                                     16.8s
 └─Moving to ../FlutterCocoaFrameworkTest/FlutterLib/Debug          45ms
Building frameworks for com.example.flutterModule in profile mode...
 ├─Creating Flutter.podspec...                                       1ms
Font asset "MaterialIcons-Regular.otf" was tree-shaken, reducing it from 1645184 to 1384 bytes (99.9% reduction). Tree-shaking can be disabled by providing the --no-tree-shake-icons
flag when building your app.
Font asset "MaterialIcons-Regular.otf" was tree-shaken, reducing it from 1645184 to 1384 bytes (99.9% reduction). Tree-shaking can be disabled by providing the --no-tree-shake-icons
flag when building your app.
 ├─Building App.xcframework...                                     32.1s
 └─Moving to ../FlutterCocoaFrameworkTest/FlutterLib/Profile         29ms
Building frameworks for com.example.flutterModule in release mode...
 ├─Creating Flutter.podspec...                                       4ms
Font asset "MaterialIcons-Regular.otf" was tree-shaken, reducing it from 1645184 to 1384 bytes (99.9% reduction). Tree-shaking can be disabled by providing the --no-tree-shake-icons
flag when building your app.
Font asset "MaterialIcons-Regular.otf" was tree-shaken, reducing it from 1645184 to 1384 bytes (99.9% reduction). Tree-shaking can be disabled by providing the --no-tree-shake-icons
flag when building your app.
 ├─Building App.xcframework...                                     28.9s
 └─Moving to ../FlutterCocoaFrameworkTest/FlutterLib/Release         57ms
Frameworks written to /Users/ksnowlv/Documents/FlutterProjects/FlutterProjects/flutter_module/../FlutterCocoaFrameworkTest/FlutterLib.
Bitcode support has been deprecated. Turn off the "Enable Bitcode" build setting in your Xcode project or you may encounter compilation errors.
See https://developer.apple.com/documentation/xcode-release-notes/xcode-14-release-notes for details.
(base) ksnowlv@MacBook-Pro-3 flutter_module %
|
3.创建iOS项目FlutterLibTest并引入flutter framework
使用XCode创建iOS项目,我使用的XCode 15.3,直接创建FlutterLibTest项目即可。
把iOS_frameworks目录下的Debug文件夹拷贝到FlutterLibTest文件夹下
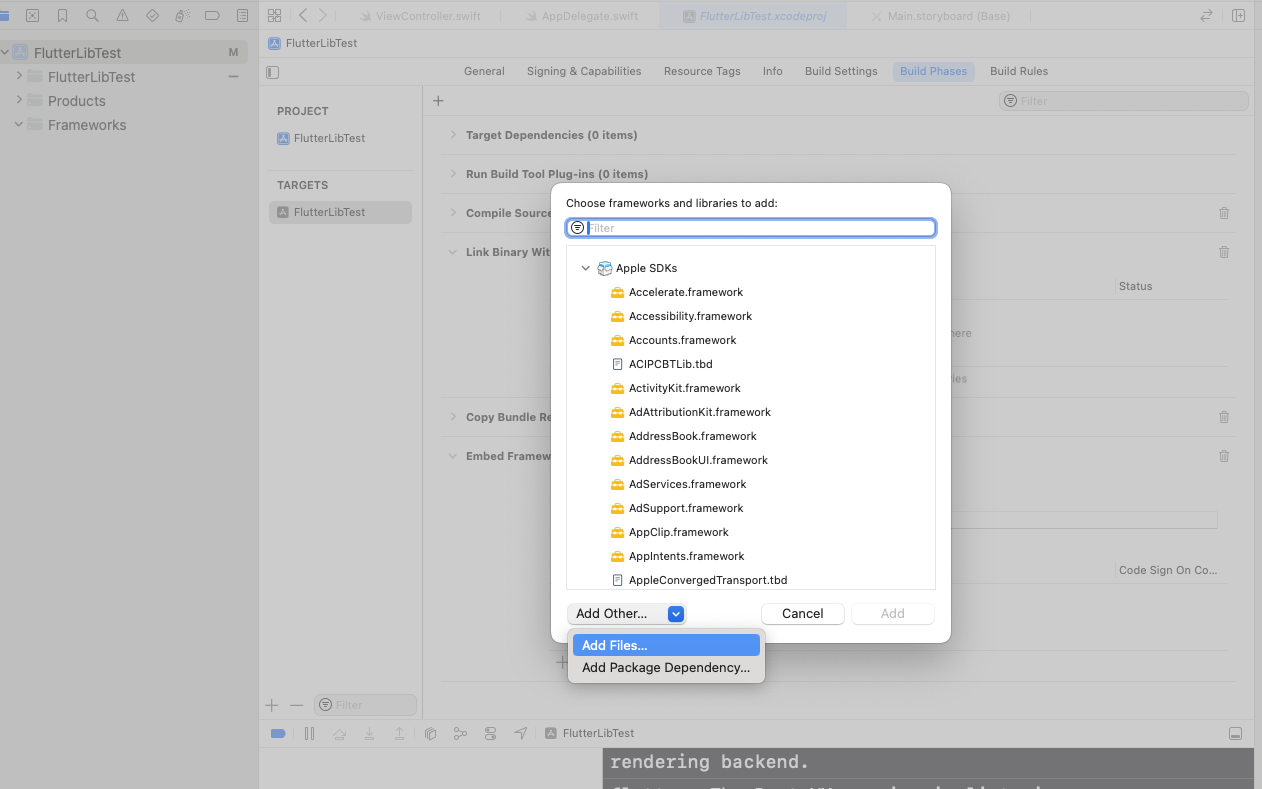
- 选中TARGETS中FlutterLibTest,
- 选择Build Phases选项卡,
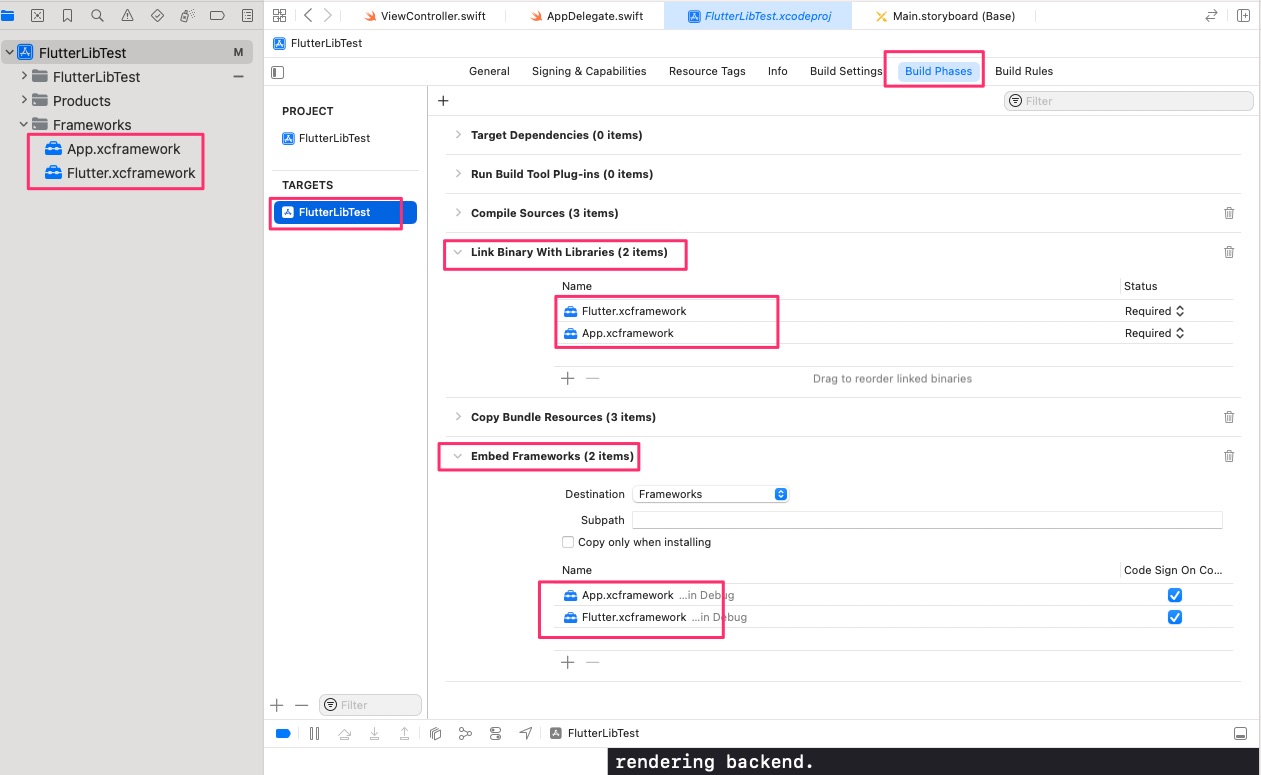
- 点击Link Binary With Libraries选项卡; 选择+,并在Add Other下拉列表中选择Add Files,选中App.xcframework和Flutter.xcframework
- 然后,在Embed Frameworks选项卡中,添加App.xcframework和Flutter.xcframework
4.显示flutter页面
 1
 2
 3
 4
 5
 6
 7
 8
 9
10
11
12
13
14
15
16
|
import UIKit
import Flutter

@main
class AppDelegate: UIResponder, UIApplicationDelegate {


    lazy var flutterEngine = FlutterEngine(name: "My Flutter engine!")

    func application(_ application: UIApplication, didFinishLaunchingWithOptions launchOptions: [UIApplication.LaunchOptionsKey: Any]?) -> Bool {
        // Override point for customization after application launch.

        flutterEngine.run()
        return true
    }
 }
|
 1
 2
 3
 4
 5
 6
 7
 8
 9
10
11
12
13
14
15
16
17
18
19
20
21
22
23
24
|
import UIKit

import Flutter

class ViewController: UIViewController {

    override func viewDidLoad() {
        super.viewDidLoad()
        // Do any additional setup after loading the view.
    }

    @IBAction func showFlutterView()  {
        let flutterEngine = (UIApplication.shared.delegate as! AppDelegate).flutterEngine
        let flutterViewController = FlutterViewController(engine: flutterEngine, nibName: nil, bundle: nil)
        let navigationController = UINavigationController(rootViewController: flutterViewController)
        navigationController.navigationBar.topItem?.rightBarButtonItem = UIBarButtonItem(barButtonSystemItem: .stop, target: self, action: #selector(dismissFlutterViewController))
        present(navigationController, animated: true, completion: nil)
    }

    @objc func dismissFlutterViewController() {
           dismiss(animated: true, completion: nil)

   }
}
|
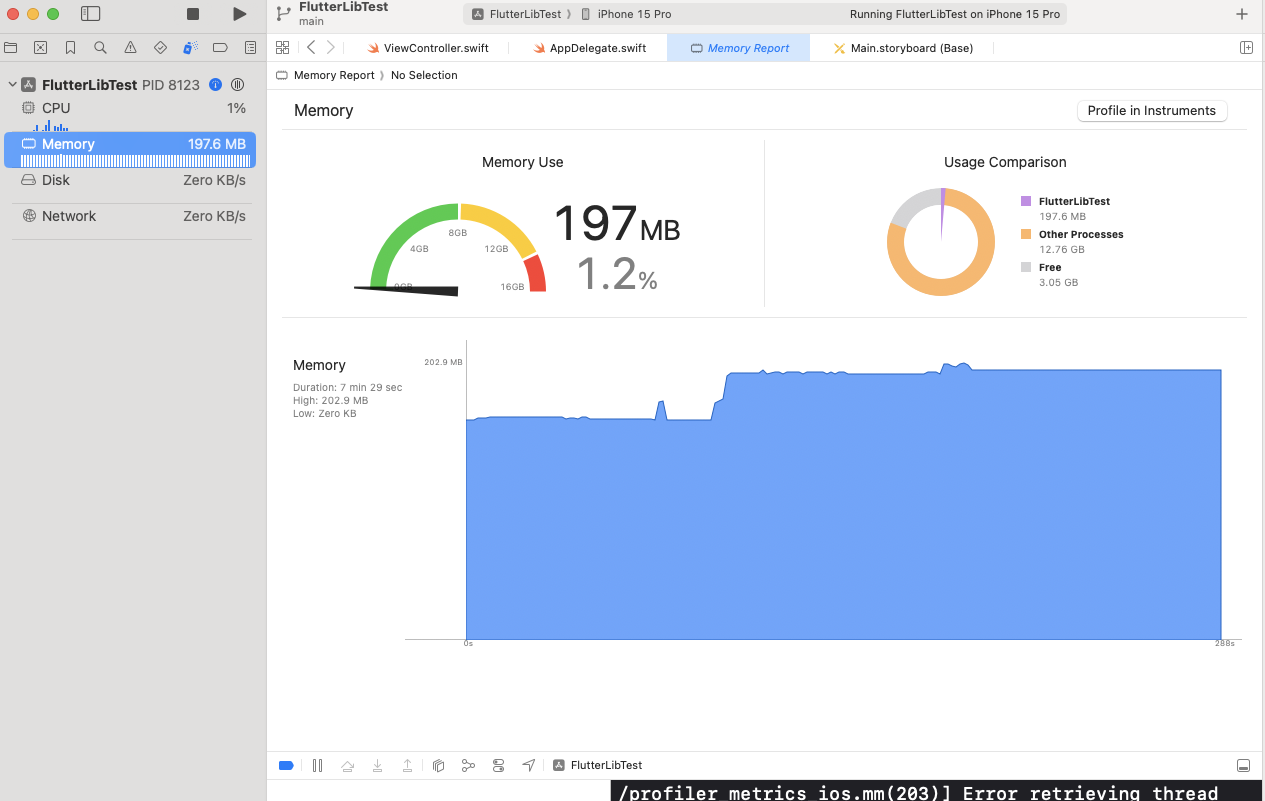
5.效果
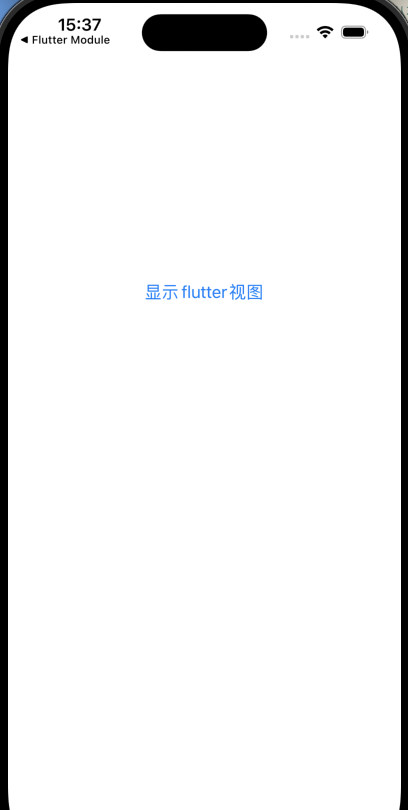
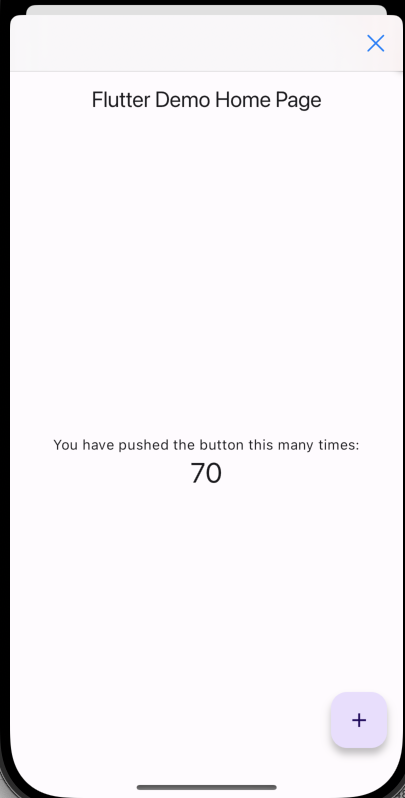
来回显示flutter视图时,内存有一定的升高,注意flutter插件内存问题。
文章作者
梵梵爸
上次更新
2024-04-17
许可协议
原创文章,如需转载请注明文章作者和出处。谢谢